Understanding the intricacies of online advertising can be a game-changer for your business. Meta Pixel, formerly known as Facebook Pixel, is a vital tool for advertisers looking to boost their campaign effectiveness. This tracking mechanism offers detailed insights into customer behavior, allowing businesses to optimize their ads and achieve better results.
In this article, we’ll explore Meta Pixel, how it works, and how to leverage it effectively. We’ll also explore how to get a Facebook Pixel, the steps to set up a Pixel correctly, and tips on how to create a Facebook Pixel for your campaigns. Let’s dive in.
What Is Meta Pixel?
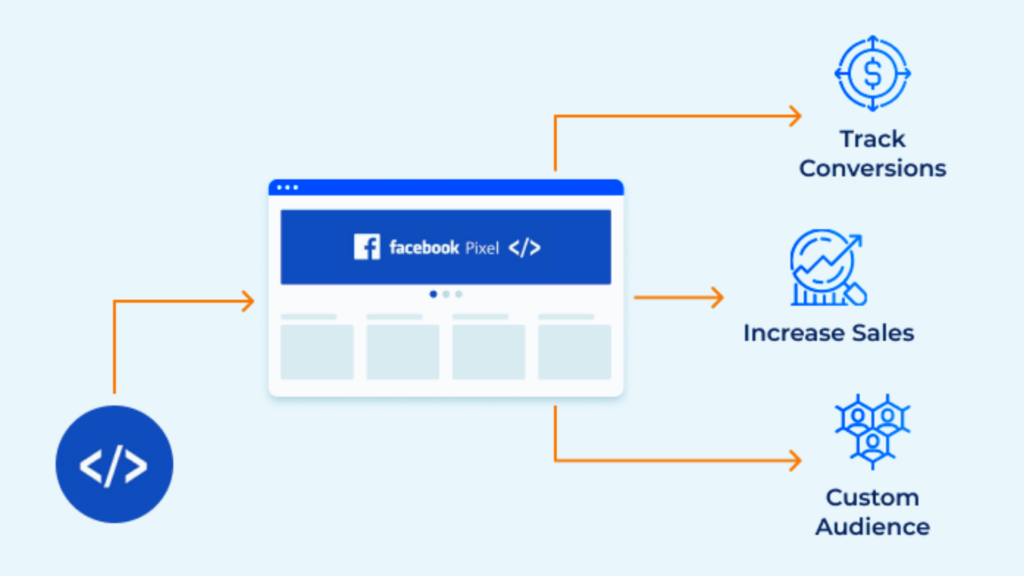
Meta Pixel is a snippet of code that you place on your website to track user interactions. It collects data about visitor behavior and feeds it back into Meta’s advertising platform. This data helps advertisers refine their ad targeting and understand which campaigns deliver the best results.
When you ask yourself, “What is Meta Pixel?” think of it as a bridge between your website and your Facebook advertising campaigns. It tracks actions such as purchases, sign-ups, and other conversions, giving you the tools to measure ad performance with precision.
For instance, if a customer adds an item to their cart but doesn’t complete the purchase, the Meta Pixel enables you to retarget that user with ads. This way, you’re not just casting a wide net; you’re engaging potential customers based on their actual behavior.

Why Use Meta Pixel for Your Campaigns?
Meta Pixel offers a range of benefits that can revolutionize your advertising approach. Here’s how it helps:
1. Better Targeting
Meta Pixel allows you to create audiences based on user interactions. For example:
- Retarget visitors who browsed a specific product but didn’t purchase.
- Build lookalike audiences using data from existing customers to find new prospects.
This feature ensures your ads are shown to the right people, reducing wasted ad spend.
2. Improved Return on Investment (ROI)
The data gathered helps pinpoint which ads generate the most conversions. This insight allows you to focus your budget on high-performing campaigns. By identifying trends in customer behavior, you can tweak your ads for maximum impact.
3. Enhanced Analytics
Setting up Meta Pixel enables you to track detailed metrics, such as page views, add-to-cart actions, purchases, scroll depth, and time spent on each page. These insights allow you to create ads that resonate with your audience and encourage them to take action.
How to Get Facebook Pixel
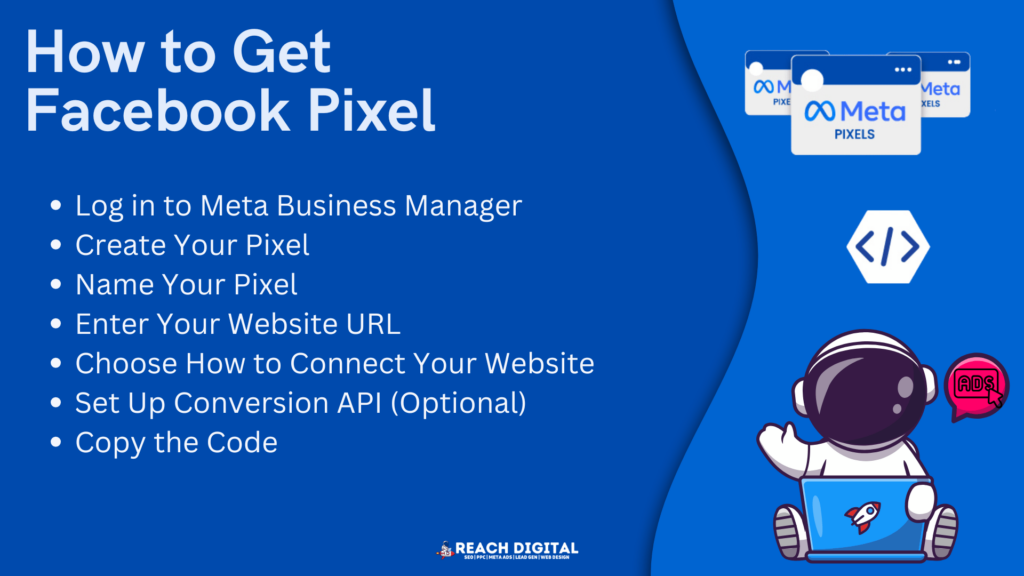
Getting started with Meta Pixel is straightforward. Follow these steps to understand how to get Facebook Pixel:
#1: Log in to Meta Business Manager
Begin by logging into your Meta Business account. Navigate to the Events Manager to access your pixel settings.
#2: Create Your Pixel
In Events Manager, select “Add Event Source” and choose the option for a web-based pixel. Check for any available partner integrations, as these can simplify the setup process if you’re using a supported platform.
#3: Name Your Pixel
Assign a clear and descriptive name to your pixel. For example, if you’re operating an e-commerce store, you might name it “E-Shop Conversion Pixel” to easily identify its purpose.
#4: Enter Your Website URL
Add your website’s URL to connect the pixel to your site. This step enables Meta to seamlessly collect data from your visitors’ actions on your site.
#5: Choose How to Connect Your Website
Decide how you want to implement the pixel code. You can either manually add the code to your website or use an integration if Meta supports your platform. This choice allows for flexible setup based on your technical comfort level.
#6: Set Up Conversion API (Optional)
If you want to enhance tracking accuracy, consider setting up Meta’s Conversion API. This feature helps capture data directly from your server, providing more reliable tracking, especially for events that may not be captured by the pixel alone.
#7: Copy the Code
After creating the pixel, copy the unique code provided. This code will be essential during the installation process to ensure the pixel functions correctly on your site.

Steps to Setup Pixel for Maximum Impact
Ensure a proper and complete installation to maximize the benefits of Meta Pixel. A well-configured pixel will track essential user interactions, enabling you to optimize your Facebook ad campaigns.
Here’s an expanded guide on how to setup Pixel effectively on your website:
1. Install the Code
Once you’ve created your Meta Pixel and received the unique code, the next step is embedding it into your website.
- Where to Place the Code: Paste the Meta Pixel code into the <head> section of your website’s HTML. This placement ensures the pixel runs across every page, capturing user interactions consistently.
- Why It’s Important: Placing the code in the header allows it to load as soon as someone visits your site. This ensures no activity is missed, even if the visitor doesn’t fully load the page.
For websites built with custom HTML, you’ll need access to your hosting or content management system (CMS). If you’re not comfortable editing code directly, reach out to your web developer for assistance.
2. Use a Tag Manager
If manual coding feels intimidating, platforms like Google Tag Manager (GTM) simplify the process.
Many popular website builders also offer seamless integrations to make setting up Meta Pixel easier:
- Google Tag Manager: GTM allows you to add the pixel without touching your website’s code. Create a new tag, select the Facebook Pixel template, and input your Pixel ID. Save and publish the changes, and you’re good to go.
- WordPress: If you’re using WordPress, plugins like PixelYourSite or Meta Tag Manager simplify pixel installation. These tools allow you to copy and paste the Pixel ID, and the plugin handles the technical details.
- Shopify: Shopify users can add the Pixel ID directly in the online store preferences under “Facebook Pixel.” This eliminates the need for manual code editing.
Using these tools ensures that your pixel is installed correctly and without errors, saving you time and reducing the risk of mistakes.
3. Verify Installation
Once the pixel is set up, you’ll want to confirm that it’s working properly. Verification ensures that the pixel is capturing the data you need for your ad campaigns.
- Meta Pixel Helper: Download the Meta Pixel Helper, a free browser extension that detects whether the pixel is active on your site. This tool will show:
- Which pages the pixel is firing on.
- Any potential errors, such as incorrect installation or missing event tracking.
- Test Events in Events Manager: The Events Manager in your Meta Business Suite provides another way to check pixel functionality. Use the “Test Events” feature to simulate user actions and confirm that the pixel is recording events correctly.
Taking the time to verify your installation ensures the pixel is set up for optimal performance, minimizing future troubleshooting.
4. Configure Events
Events are specific actions users take on your website, such as making a purchase, signing up for a newsletter, or clicking a specific button.
Proper event configuration allows you to track these actions and gather meaningful data.
- Standard Events: Meta Pixel supports predefined events, such as:
- Purchase: Tracks when a customer completes a transaction.
- Add to Cart: Monitors when users add items to their shopping carts.
- Lead: Tracks form submissions or sign-ups.
- Custom Events: For unique business goals, you can create custom events tailored to your needs. Use the Event Setup Tool to configure these without additional coding. Simply navigate to Events Manager, select your pixel, and choose “Set Up Events.” Click the relevant page elements, such as buttons or forms, and assign them to the appropriate event type.
- Event Parameters: Add details to events, such as the value of a purchase or the category of an item viewed. These parameters provide deeper insights, enabling more targeted ad strategies.
Get it Right with the Help of Experts
Meta Pixel is an essential tool for any business aiming to optimize its Facebook ad campaigns. From understanding what is Meta Pixel to mastering the process of how to get Facebook Pixel, setup Pixel, and how to create a Facebook Pixel, this guide provides a comprehensive roadmap for success.
For businesses looking to take their advertising to the next level, Reach Digital is your partner in digital marketing and social media excellence.
Get in touch today and let the experts help you unlock the full potential of Meta Pixel.


